Amazon KDP InDesign Template Preflight Checklist Guide
Amazon KDP InDesign Template: Preflight Checklist + Print-Ready PDF Export Settings
Estimated reading time: 9 minutes
- A KDP-ready InDesign template begins with correct trim size, bleed, and gutter plus master pages and paragraph styles to save time.
- Use InDesign Preflight, Package, and export to PDF/X-1a (or High Quality Print) with embedded fonts to avoid common KDP rejections.
- For authors who prefer automation, BookAutoAI produces formatted interiors, covers, and EPUBs to reduce manual errors and speed publication.
Table of Contents
- Why an Amazon KDP InDesign template matters (short primer)
- Preflight checklist: set up your document for KDP success
- Choose the correct trim size and page count
- Set margins and gutter
- Add bleed
- Build master pages and paragraph styles
- Images, color, and resolution
- Fonts and special characters
- Cross-references, footnotes, and TOC
- Use InDesign Preflight and Package
- Keep pages single, check spreads
- Proof locally and on KDP previewer
- Exporting a print-ready PDF for KDP: practical settings and common pitfalls
- Common KDP rejection causes and fixes
- Ebook versus print workflows
- Covers and full-wrap files
- Final technical tips
- Final thoughts and next steps
- FAQ
- Sources
Why an Amazon KDP InDesign template matters (short primer)
Templates enforce the mechanical rules KDP expects: exact trim sizes, consistent margins, correct bleed, and predictable spines. They also centralize repeated elements like running heads, page numbers, and paragraph formatting so the interior reads and prints consistently.
If you’d like a step-by-step companion that focuses on KDP-ready layout patterns, see the Amazon KDP Formatting Guide 2 for additional reference and walkthroughs that pair well with this approach.
Preflight checklist: set up your document for KDP success
Good preflight starts before you place a single image. Treat these steps as the baseline for a file that will pass platform checks and print predictably.
1) Choose the correct trim size and page count
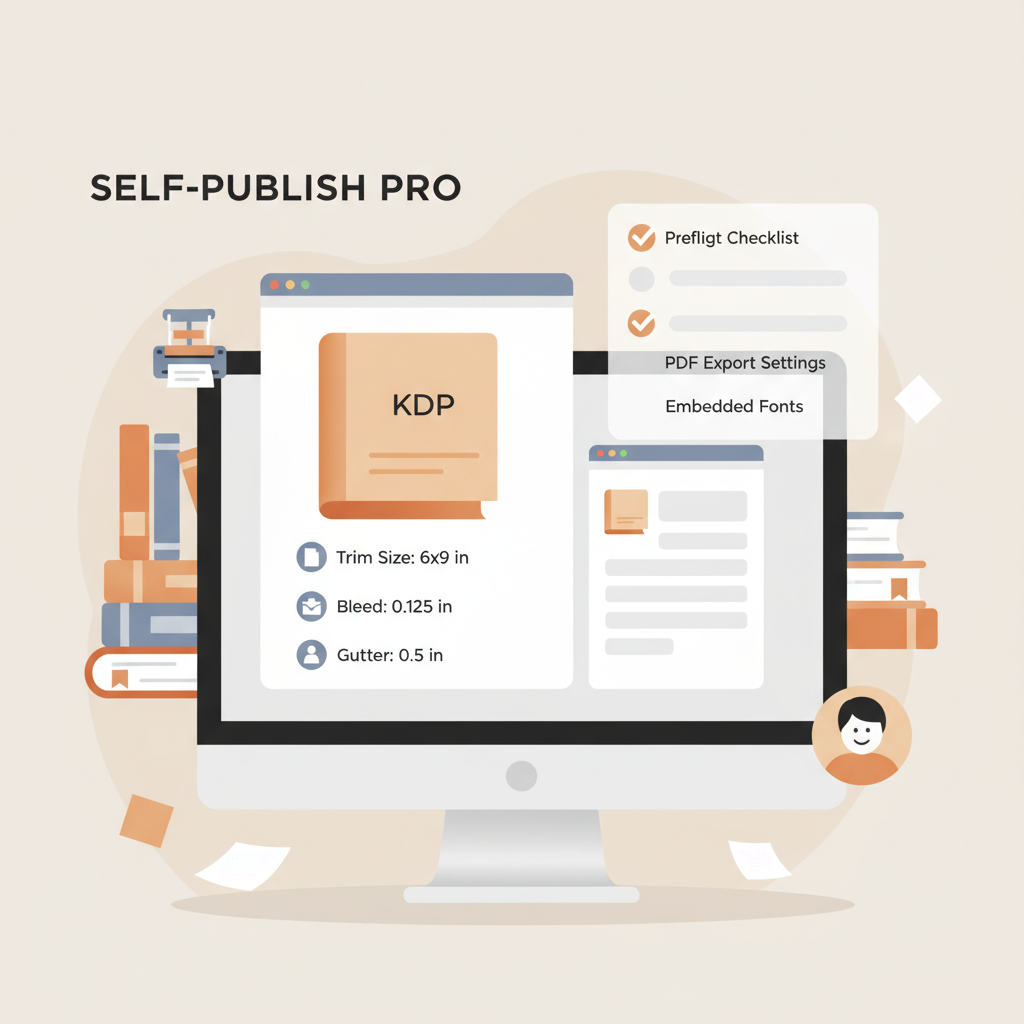
Confirm the exact trim size KDP expects (common sizes: 6″ x 9″, 5.5″ x 8.5″). Enter dimensions precisely in New Document.
Note: For paperback covers you must plan the full-wrap (front + back + spine) dimensions; set interiors as single pages unless you intentionally design spreads.
2) Set margins and gutter
Use margins that respect readable white space plus KDP minimums. Increase the inner gutter for thicker books so the text isn’t lost in the binding.
Typical starting values for 6″ x 9″: 0.5″ outside, 0.75″ gutter for long books, and 0.5″ top/bottom — but always verify KDP guidance for your page count and paper choice.
3) Add bleed
Set Document Bleed to 0.125″ on all sides for elements that extend to trim. Avoid placing vital text in the bleed area; keep safe text at least 0.125″ inside the trim edge.
4) Build master pages and paragraph styles
Create an A‑Master with running headers, page numbers, and a baseline grid. Apply paragraph styles for body, subheads, captions, and bullets for consistent spacing and automatic TOC generation.
Use character styles for monospace code or emphasis — they’re more maintainable than manual formatting.
5) Images, color, and resolution
Use 300 DPI images at final placed size. Downsample only when necessary and keep source files in your package.
Convert images to CMYK or supply RGB with controlled conversion at export to reduce unpredictable color shifts. Avoid spot colors unless you understand their conversion.
6) Fonts and special characters
Embed fonts rather than outlining body text. Embedded fonts preserve hyphenation, searchability, and accessibility. Check font licensing to ensure embedding is allowed.
7) Cross-references, footnotes, and tables of contents
Use consistent paragraph styles so InDesign can build a TOC automatically. For long non-fiction, apply styles to footnotes and endnotes and recheck pagination after edits.
8) Use InDesign Preflight and Package
Run InDesign’s Preflight to catch missing fonts, low-res images, overset text, and other issues. Then use File > Package to collect fonts, linked images, and a report for archiving or handoff.
9) Keep pages single, check spreads for images
Most KDP interiors should be exported as single pages. If you design two‑page spreads for art-heavy books, confirm KDP’s requirements for spreads before export.
10) Proof locally and on KDP previewer
Export a proof PDF, review it in Acrobat, and use KDP’s previewer. Order a printed proof — physical copies reveal margin, gutter, and pagination issues that screen previews can miss.
If you want to avoid manual template work entirely, BookAutoAI automates interior layout and produces KDP-ready files while also generating covers and EPUBs to reduce manual errors.
Exporting a print-ready PDF for KDP: practical settings and common pitfalls
Export settings are where most KDP submission problems occur. Follow the checklist below to minimize rejections and visual surprises.
1) Which PDF preset to use
PDF/X-1a:2001 and High Quality Print are common. PDF/X-1a flattens transparency and forces CMYK, which reduces color surprises; High Quality Print preserves more live transparency.
Tip: When in doubt, use PDF/X-1a and verify visual quality after export.
2) File > Export > Adobe PDF (Print) — key tabs and options
General: Export as Pages (not Spreads) unless you intentionally designed spreads. Compatibility: Acrobat 4 (PDF 1.3) or higher; PDF/X-1a enforces compliance.
Compression: Downsample images above 300 ppi to 300 ppi; use JPEG at Maximum quality or ZIP for lossless output.
Marks & Bleeds: Do NOT include printer marks—KDP prefers files without crop/bleed marks. Check Use Document Bleed Settings so the 0.125″ bleed transfers.
Output: Convert to Destination (Preserve Numbers) or convert to CMYK with an appropriate profile (e.g., U.S. Web Coated SWOP v2). Include or omit ICC profiles based on your needs; embedding is safer.
Security: Do not apply passwords or restrictions—KDP must open and process the PDF.
3) Fonts and Subsetting
Embed all fonts; confirm embedding in Acrobat or via Preflight. Avoid excessive subsetting so hyphenation and searchability remain intact.
4) Transparency flattening
PDF/X-1a will flatten transparency. Inspect the exported PDF for artifacts; if flattening creates issues, simplify layered effects or use a higher-quality preset.
5) Image issues to avoid
Ensure all placed images are 300 DPI at final size. Do not upscale images beyond their native pixel dimensions. Use controlled color adjustments and confirm with a printed proof if color matters.
6) File size and upload tips
Keep file size reasonable. Optimize images (avoid oversized TIFFs); flatten unnecessary layers. KDP has upload limits—reduce embedded assets if needed.
If you manage multiple retailer uploads, consider using a dedicated book upload tool to streamline the process and avoid repetitive errors; many authors use specialized book upload services to simplify multiple retailer submissions.
7) Check the exported PDF
Open the exported PDF in Acrobat and verify page count, bleed, embedded fonts, page order, numbering, and image quality. Use KDP’s online previewer and order a printed proof when possible.
Common KDP rejection causes and fixes
Missing fonts → re-export with embeddable fonts. No bleed or wrong trim size → recreate PDF with proper document bleed. Low-res images → replace with 300 DPI assets. Transparency artifacts → flatten carefully. Incorrect page order → export as Pages, not Spreads.
Ebook versus print workflows
You cannot upload a print PDF as an ebook. Ebooks require reflowable EPUB or fixed-layout EPUB for complex designs. InDesign can export EPUB, but many exports need cleanup.
If you prefer a cleaner route from manuscript to ebook, use an EPUB tool designed for authors; for example, BookAutoAI’s EPUB converter packages metadata, embeds cover files correctly, and generates store-ready EPUBs.
Covers and full-wrap files
Paperback covers require full-wrap PDFs sized to front + back + spine. Use KDP’s cover calculator for exact spine width and include bleeds with 300 DPI images.
Many authors skip manual cover layout; BookAutoAI’s cover generator produces market-focused covers with correct sizing and thumbnail readability.
Final technical tips
Archive a packaged folder with fonts and images for future edits. Keep a checklist for each upload: trim size, page count, paper choice, bleed, embedded fonts, exported preset, and proof status.
Always use KDP’s previewer and order a printed proof before wide release. If you upload to multiple retailers, consider book upload services to simplify repetitive steps; a trusted book upload partner can reduce manual errors and save time (book upload).
Final thoughts and next steps
A reliable InDesign template plus a disciplined preflight checklist and consistent export settings dramatically reduce last-minute issues and rejected uploads. Learn the core InDesign steps for full control and use automation selectively when it speeds production without sacrificing quality.
For authors who want a mostly automated route, Bookautoai and BookAutoAI-style tools can generate interiors, covers, and EPUBs that are platform-ready; the exact solution depends on how much manual control you prefer.
FAQ
Do I need to use InDesign to publish on KDP?
No. InDesign is preferred for complex layouts, but KDP accepts DOCX for simpler interiors and EPUB for ebooks. Automated systems can also create formatted interiors without InDesign.
Should I export as PDF/X-1a or High Quality Print?
PDF/X-1a is often safer because it standardizes color and flattens transparency. High Quality Print preserves more effects but can introduce variability.
How big should bleeds and margins be for KDP?
Set document bleed to 0.125″ on all sides and leave safe text margins at least 0.125″ inside the trim edge beyond platform recommendations; adjust the inner gutter for thicker books.
Can I use InDesign to generate EPUBs for KDP?
InDesign can export EPUB, but complex non-fiction layouts often require post-export cleanup. Consider a dedicated EPUB converter for reliable, store-ready EPUBs.
What are the most common reasons a KDP interior PDF is rejected?
Missing font embeds, incorrect trim size or bleed, low-resolution images, and transparency or color conversion issues are the top causes. Run Preflight and check exported PDFs in Acrobat before uploading.
Is it better to outline fonts or embed them?
Embed fonts whenever possible — it preserves searchability, hyphenation, and accessibility. Outlining removes searchable text and can increase file size.
Sources
- https://www.youtube.com/watch?v=lWnOKAH6lW0
- https://community.adobe.com/t5/indesign-discussions/indesign-printing-for-kdp-book-cover-and-manuscript-etc/td-p/13816635
- https://www.youtube.com/watch?v=Br_1CQ_-KjY
- https://kindlepreneur.com/kdp-interior-templates/
- https://kdp.amazon.com/en_US/help/topic/G201834230
- https://kdpcommunity.com/s/question/0D5f400000pAqBnCAK/are-there-any-indesign-templates-for-the-new-kdp?language=en_US
- https://kdp.amazon.com/help/topic/GVBQ3CMEQW3W2VL6
Amazon KDP InDesign Template: Preflight Checklist + Print-Ready PDF Export Settings Estimated reading time: 9 minutes A KDP-ready InDesign template begins with correct trim size, bleed, and gutter plus master pages and paragraph styles to save time. Use InDesign Preflight, Package, and export to PDF/X-1a (or High Quality Print) with embedded fonts to avoid common…